I remember couple of years back when I had to integrate Sharepoint with Salesforce ,only option I could think of is to visit appexchange and pay some bugs to get this up and running.There was a free app "Chatter For Sharepoint".Configuring this was again scanning through lot of documents .
File Connect lets you connect Microsoft SharePoint 2010, SharePoint 2013 or SharePoint Online account, and everything is indexed and made searchable within your Salesforce environment.File connect is not just about sharepoint and in general its about sharing salesforce files outside salesforce organization.
In this blogpost I will walk through simple steps to connect Microsoft 365 Sharepoint to Salesforce Files and bring Files located in sharepoint to SFDC.
It won't be too detailed as salesforce documentation around this is awesome but will add necessary Screenshot to help folks who want to set quick demo for clients to showcase.
Step 1-Sign Up for a trial account from microsoft for online sharepoint .Office 365 trial edition will work well .
Step 2-Select a sample site for sharepoint and try accessing this site .Note URL as this URL we will be using lot throughout configuration.
Also note microsoft domain as this will be used as well for further configuration.The below shows how your admin console look and you can navigate and select and activate a sharepoint site .
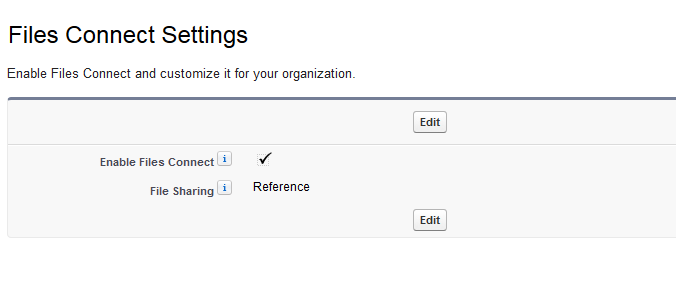
Step 3-Enabling file connect in Salesforce .
Choose Reference if you want only view else prefer copy option
Step 4-Creating permission set for Microsoft access 365 online
Assign this to Users
https://help.salesforce.com/HTViewHelpDoc?id=admin_files_connect_perm.htm&language=en_US
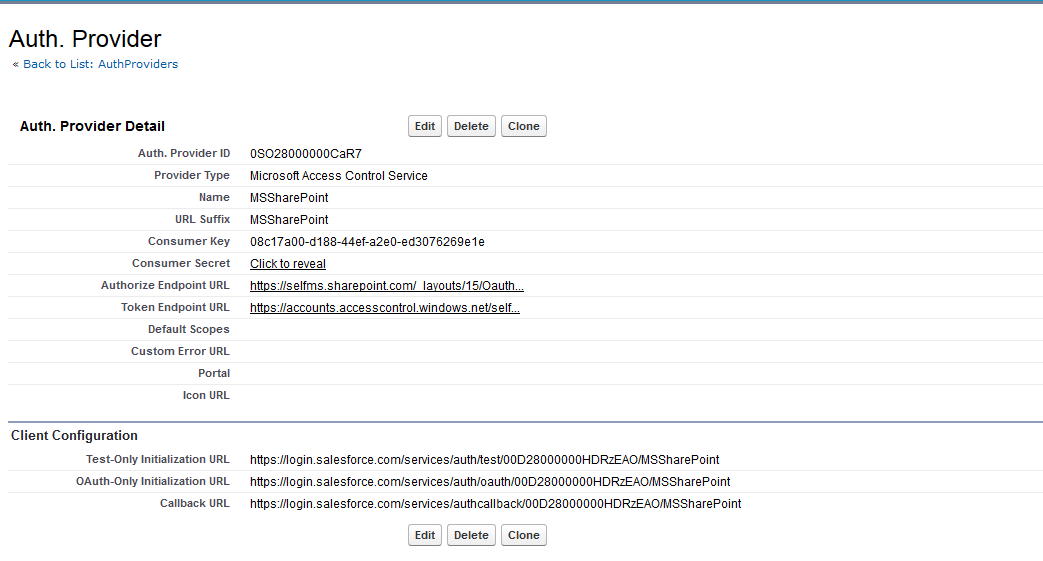
Step 5-Create an Authentication Provider for SharePoint Online or OneDrive for Business
This is well documented in below article from salesforce.
https://help.salesforce.com/HTViewHelpDoc?id=admin_files_connect_sp_online_auth.htm&language=en_US
I am attaching screenshot from both sharepoint and salesforce end on how this should look
The sharepoint App configured final screen should resemble something like below
Step 6-Creating external data source
On successful authentication click validate and sync button .
Step 7-Associate External data source with Permission set
Debugging tips
1)If oauth is failing double check auth provider configuration and domains entered in sharepoint settings .
2)If permission issues check permission sets and users are assigned .Also chatter for sharepoint is enabled for user or at profile level user is assigned valid permission.
Our final finished integration will look as below
Great thing is global search will search from sharepoint as well as chatter files
Hope you enjoyed and Let me know if anyone is encountering any issue in getting this to work .


Nice Blog, Thanks to share an amazing information with us, It helps me alot salesforce customer portal
ReplyDeleteGreat blog. All posts have something to learn. Your work is very good and I appreciate you and hopping for some more informative posts. Cryptocurrency Services
ReplyDeleteNice post.
ReplyDeleteOffice 365 training
Open stack online training
Open stack training
SAP ABAP on Hana online training
SAP ABAP on Hana training
SAP ABAP online training
SAP ABAP training
SAP Basis online training
SAP Basis training
SAP Bods online training
SAP Bods training
SAP BW on Hana online training
SAP BW on Hana training
SAP CS online training
SAP CS training
SAP Fico online training
SAP Fico training
Great blog knowledgeable information it very effective for beginner .keep sharing more blogs. To know more about Office 365 Our Website Aslo Helps Office365 Online Training
ReplyDelete